
Inset Pocket Tutorial
This tutorial for Inset Pockets can be used on the:
- Essential Pants
- Mega Ruffles
- Flounce Ruffles
- Skinny Minnie Pants
- Ladies Yoga Pants
- Ladies Wideleg Pants
Print out the pocket pattern and cut the desired size.
You can download the printable pattern pieces HERE
Includes sizes newborn through 14, doll, and ladies
Cut 2 from fabric.

I like to leave the curve attached to the pattern just folded back out of the way.

Cut out the curve on 2 facing pieces.

Use the small curved cut out to make a template on the Essential Pants front.

Cut away curve template.

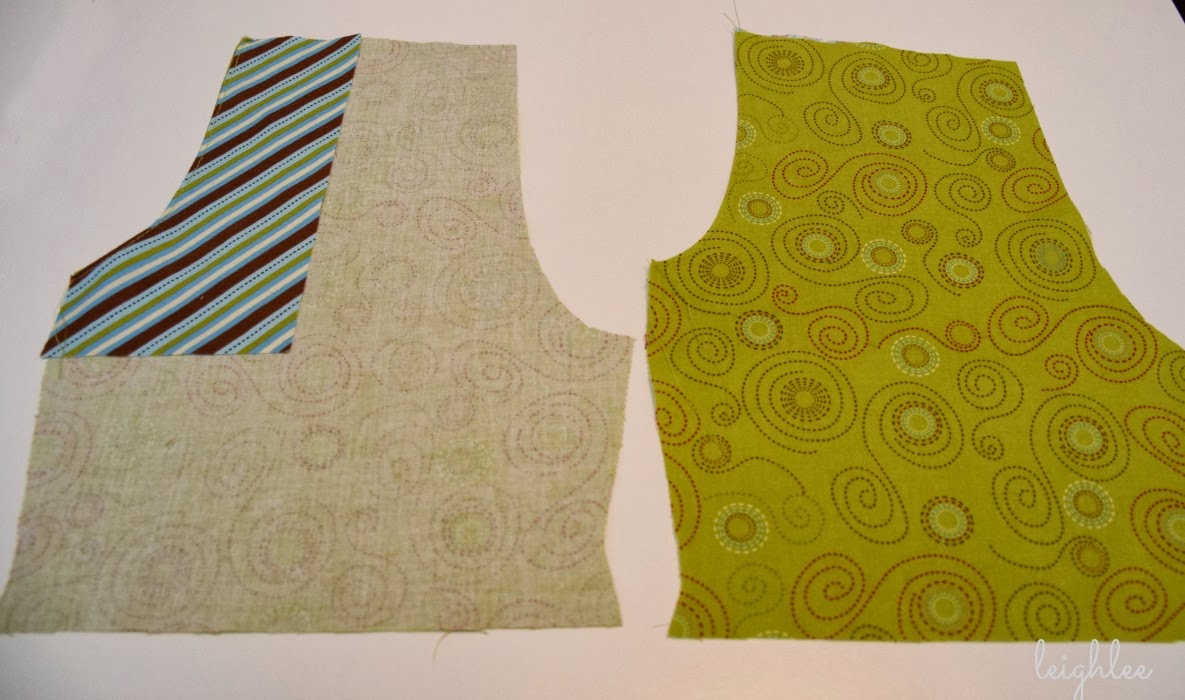
At this point we have 2 squares and 2 facing pieces with a curve cutout. Be sure the curves are facing opposite directions.

Lay facing on top of pants front, matching the curves. Stitch at 3/8in.

Clip curves. I use pinking shears to clip curves, but you may also make small cuts all the way to the stitching line (but don't cut the stitching).

Turn the pocket facing to the underside of the pants front, iron. You will have a seam at the curve and the facing will be under the pants front. Topstitch at 1/4in.
Place square pocket piece over the curve with the right side facing pants front (or right side of pocket to right side of facing). Stitch inside of pocket pieces together and finish (the two inside edges).

Baste along top and outside edges to keep the pocket in place. You have completed Inset Pockets!


No comments:
Post a Comment