Showing posts with label peplum top. Show all posts

Thursday, December 17, 2015

Jocole Basic Leggings into Pajama Pants

Jocole Basic Leggings

I am so happy to share a tutorial from Skirt Fixation with you today.  If you've never visited Skirt Fixation, you should go check Audrey out.  Audrey made a pajama set from the Basic Leggings and Peplum top.  I love that Jocole patterns are so easily modified for just about anything you want to make.  Without further ado, Audrey has some tips to share!


Hi Jocole pattern lovers from a fellow Jocole fan! This is Audrey from Skirt Fixation, and I’ve sewn up ALL (but one...gotta work on that) of the Jocole skirt patterns, and the Peplum top multiple times. Today I have a tutorial for you on how to convert the Jocole Basic Leggings pattern into pajama pants. Because everyone’s making pj’s this time of year, and you deserve some pretty new ones too. Let’s get started.

Step 1: Cut out a 2 cuff pieces. This is sort of play it by ear. I tried on a shirt I’d made around my ankle to see how a wrist cuff worked on my ankle. Turned out perfectly, so I just used the wristband piece from another pattern. If it’s too tight, add width.  You will also want to shorten the length of your leg piece by 1/2 the amount of your cuff piece. Just do this right at the bottom of the leg.Pajama Pants tutorial by Skirt Fixation   Step 2: Fold cuff piece in 1/2, WRONG sides together. Pajama Pants tutorial by Skirt Fixation Step 3: Pin cuff to bottom of leggings. The cuff will be smaller than the leg, and need to be evenly stretched to fit. Pajama Pants tutorial by Skirt Fixation Step 4: Sew cuff to bottom of leggings. You will need to stretch the cuff slightly as you sew. Pajama Pants tutorial by Skirt Fixation Step 5: Stitch the inseam on the leggings and the cuff. Pajama Pants tutorial by Skirt Fixation Step 6: After you stitch your inseam, I recommend topstiching 1/8 from the seam allowance as recommended to catch that seam and make those pajama pants nice and cozy! Complete the instructions to assemble the Basic Leggings pattern. Pajama Pants tutorial by Skirt Fixation That’s it! Simple, right? If you want to see the matching top I made and the other pair of pajamas I made for my daughter, please visit us at Skirt Fixation. Sweet dreams!

Tuesday, October 20, 2015

Jocole Blog Tour Oct 19

Today we have Gemia From Phat Quarters Blog bring us a post about the Pencil Skirt and Peplum Top.  Her outfit is to die for!  Go check it out here.

XOXO,

Kara


Saturday, October 17, 2015

Jocole Fall Blog Tour Oct 17


Today we have Hibbadoray on the blog tour.  Can you even stand the cuteness?   Joey made an adorable halloween costume from the Peplum and Ruffle Leggings.  Be sure to visit her page here to see more photos and read her post.


XOXO,

Kara

Thursday, October 15, 2015

Jocole Fall Blog Tour Oct. 16

Jocole October Fall Blog Tour


Lisa is on the blog tour today with her cute Peplum, see her blog post here.


Magda has the Widely Pants featured, see her blog post here.

XOXO,

Kara
 

Thursday, April 09, 2015

Modification Mashup - Crossover + Peplum

Ready for a fun mashup of the Crossover dress and peplum?? Because really...these two were just begging to be made together. Bonus? Printable pattern pieces for girls and ladies to be able to do the midriff banding. Because Jodi is just that awesome.

You can download the pattern piece HERE for free -- seriously, all sizes
(girls nb-14 AND the ladies xs-xxxl)
For this top you need the new Mix and Match Crossover top (women's or girl's), the Classic Sleeve (women's or girl's), and the Peplum top (womens or girls). (Although to be honest, it would be super cute with a skater skirt (womens or girls), too!!)
Ready for the super fast cutting and sewing? Because it really only takes MAYBE an hour to cut and sew the whole thing! You could make the whole thing with one fabric, mix it up with two fabrics like I did, or even make every piece a different fabric for something really fun and funky!
Cut out the mix and match crossover bodice.
Cut out the band for the middle using the free pattern.
Cut out the sleeve to the desired length.
Cut out the peplum.

Sew together, hem and bind as you desire! Voila! It takes almost no time at all!! And the end result is so fun and cute!!

Tuesday, March 24, 2015

Peplum Top >> Basic Tee Modification Tutorial

Peplum Tee


To go along with March 2015's Mini-Bundle that is on sale ONLY this month, we'll be featuring free tutorials on new ways to use the patterns that are included in the Mini-Bundle.  You can order it HEREnow through March 31st at 11:59pm.

*****

I have the easiest tutorial for you today.  Seriously, the easiest!!!!


Do you have the Peplum Top pattern?  Jodi has made a pattern piece to fit on the bottom of the Peplum to make it a plain t-shirt, in all sizes!  Exciting!

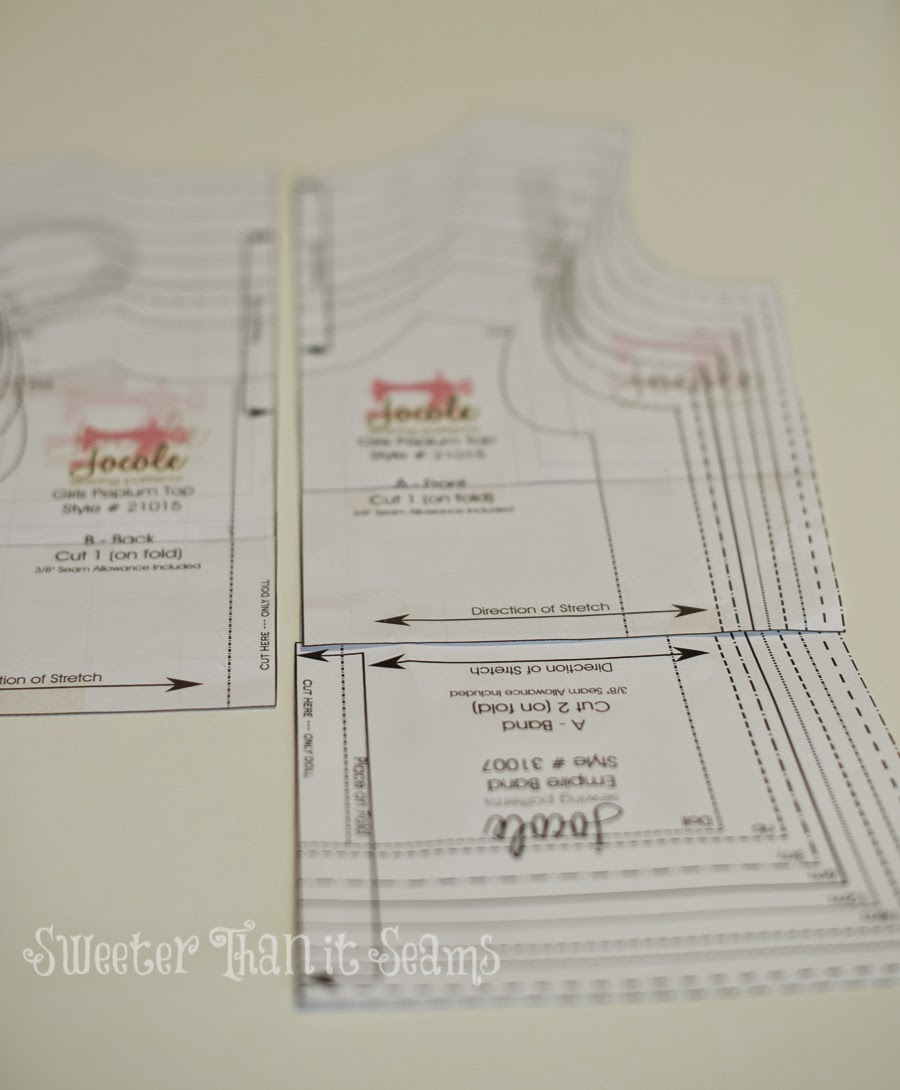
Print out the "Band" pattern piece and cut the desired size.  Place the pattern piece along the bottom edge of the Peplum so that the fold line matches the Top Front (or Back) fold line -- you'll need to flip the pattern piece upside down.   You can see below that the pattern now looks like a regular t-shirt.

You can download the pattern piece HERE for free -- seriously, all sizes
(girls nb-14 AND the ladies xs-xxxl)


You will have Front, Back, sleeve and binding pieces.  Follow the pattern as directed except there is no need to add the Peplum skirt onto the t-shirt.  You have the perfect tee!  I made this one in swimsuit fabric so my "little" can wear it to the lake this summer.


Enjoy!

XOXO,
Kara

Thursday, March 12, 2015

Skater Skirt Tutorial

Skater Skirt Tutorial

To go along with March 2015's Mini-Bundle that is on sale ONLY this month, we'll be featuring free tutorials on new ways to use the patterns that are included in the Mini-Bundle.  You can order it HERE now through March 31st at 11:59pm.


Do you have the Girls Peplum pattern with the Skater Skirt add-on?   You can make a cute little Skater Skirt out of it!

Cut out the Skirt portion of the Skater Skirt add-on and a waistband in the appropriate size.

We've decided to include the cutting measurements for the waistband ... NO guessing.  ENJOY!!
You can find waistband measurements here::

Attach the 2 skirt pieces at the sides.


Attach the short sides of the waistband.  Fold waistband in half WST.

Mark the skirt and waistband into quarters.


Line up pins and attach waistband to the skirt.


The skirt is finished!  


XOXO,
Kara

Here is another pair made by Risa West

Tuesday, March 03, 2015

March 2015's Mini-Bundle Annoucement

Jocole is SOOOOO excited to introduce a new concept for my patterns ... each month I'll release a mini-bunde with select patterns (March 2015 has 5) at a reduced price.


For March 2015 we decided on patterns that would work well together and will be featuring tutorials on modifying them and mixing them together ALLLLL month long.  What a fun way to try out some patterns and use them in different ways.

This special bundle price will ONLY last through the end of March, so get it while you can and make sure you check back for the fun tutorials.

Total Retail Price = $43.0
Discount Mini-Bundle Price = $26 (40% OFF!!)

Details for Each Pattern:

1.  Crossover Tunic & Dress (Retail Price $8)
This tunic features a crossover v-neckline and extended cap sleeves. A-line shaped skirt with THREE different lengths make this a versatile pattern: hip length, tunic length, knee length. Binding around the neckline and armholes. Perfect for everyday wear, or super comfy as a nightgown.
13 sizes included: (12m-14 + doll)

2.  Peplum Top (Retail Price $9)
Fitted knit t-shirt with a peplum at the natural waist (also includes the option for a longer peplum in the back).  Patterns includes 3 sleeve length options:  short sleeves, 3/4 sleeves, long sleeves
16 sizes included: (nb-14 + doll)

3.  Skater Skirt Add-on (Retail Price $4.50)
Add a knee length curved, flared skirt to the natural waistline of the peplum top.
16 sizes included: (nb-14 + doll)

4.  Happy Herringbone Dress (Retail Price $10)
A super cute halter dress featuring an empire bodice with an elastic back and a pieced herringbone style skirt.  Bodice is fully lined for comfort.
Two length options: tunic or dress.
16 sizes included: (nb-14 + doll)

5.  Endless Dress + Vol. 1 (Retail Price $12)
The Endless Dress is the ONLY dress pattern you are EVER going to need.
A timeless and classic style dress with a peter pan collar, or 2 different necklines, fully lined empire or waist length bodice.
3 Sleeve length options: short sleeves, 3/4 sleeves or long sleeves
Tunic Length or Knee Length Gathered Skirting
Button or Snap closure at center back.

Add-On Options: Volume 1 is included for even *more* options:
Chevron Bodice, Bib Front, Sleeveless Bodice, Sash and Banded Skirting
Ribbon Bow, Applique and Freezer Paper Stencil Embellishments
To see how truly versatile this pattern is check out THIS BLOG POST for more information which explains how you can make 1,080 different dresses and tops.
To see MORE inspiration photos, please visit THIS ALBUM on the Jocole fan page dedicated to just the Endless Dress.
16 sizes included: (nb-14 + doll)

Total Retail Price = $43.0

Discount Mini-Bundle Price = $26 (40% OFF!!)

Thursday, December 11, 2014

Peplum Sew Along Day 3

Peplum Sew Along

Day 3

Today is a quick sewing day.  The top of the shirt is complete, now let's add on the skirt.

Hem the bottom of the peplum.  Attach the skirt to the top and attach.


As my youngest daughter would say, woila!  Congratulations, you have completed the Peplum and have a new garment to add to your wardrobe!

Be sure to add your photos of your Peplum in the Jocole Facebook Group with the hashtag #jocolesewalong.  


Wednesday, December 10, 2014

Peplum Sew Along Day 2

Peplum Sew Along 

Day 2


Now that you have the fabric cut and ready to go, let's get started.  
  1. Sew the bodice front and back together at the shoulder seams.
  2. Finish neckline as desired.  My favorite method is using a neckband.
  3. Attach the sleeves.

  4.  Press the hem.
  5.  Sew the side seams of the top.

That's all for today.  Super simple, and fast!  See you tomorrow.


Monday, December 08, 2014

Peplum Sew Along

Peplum Sew Along

Day 1


It's here!  Time to sew the Peplum Top or Skater Dress.   I'll be sewing the Peplum Top, so let's get started.

Today you need to print and tape the pattern together and cut the fabric.  Be sure that the stretch of the fabric goes across the body.  My fabric is only 2 way stretch so I had to be careful about cutting the pattern the correct way.  You should have something similar to the photo below.


Tomorrow we start sewing so get ready to make an outfit for date night this weekend.

Sunday, December 07, 2014

Peplum Sew Along

Peplum Sew Along


Are you ready for a quick sew along?  The Peplum Top and Skater Skirt are such quick patterns, you can have a new outfit in just a couple of days (or if you do it all at once, just a few hours!).  I'm planning to make a holiday outfit with the Peplum as a sparkly top and Skinny Pants.  I hope you will join me!


Here is the schedule we will follow.  Grab some fabric and get ready!


Saturday, December 06, 2014

Peplum Coloring Page

Peplum Coloring Page


Is there anything better than a printable coloring page to go with a pdf sewing pattern?  You can download the coloring page for the Peplum Top and the Skater Skirt Add-on HERE.

Have you seen tester photos of the Peplum?  Well, they are adorable!


Can you believe?  Not only a girls pattern but also a women's pattern.

It even works for the teen crowd.


I love this pattern so much I want to make a sparkly, dressy one for my holiday parties.  So, let's get to work next week and have a sew along!  That's right, go get some fabric this weekend and lets sew a Peplum together.  Ready?  Go!