Pages

Monday, July 21, 2014

How to Make a Cinch Sac Backpack

How to Make a Cinch Sac Backpack

Supplies:
  1. Cording - 2 pieces each about 60" long
  2. Fabric - 2 pieces about 12"X14" each (could be bigger)
  3. Embroidery Design and supplies


Cut 2, 12" X 14" pieces of fabric.  You can make the cinch sac bigger if you would like, just cut the fabric pieces bigger.  Embroider the desired design onto one of the fabric pieces.  Be sure to iron around the embroidery so that it doesn't look like mine.


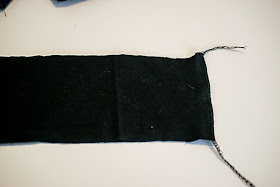
Serge all four sides of both fabric pieces.


On both pieces, turn the top serged edge under another 1/4" and press.


Measure down 2" from the top edge and turn the fabric down to meet that mark.  Sew the seam down.


Line up the front and back pieces, RST.  Sew along the three remaining edges to make the sac.  Start and stop sewing just below the top seam.  We are leaving the edges open at the top seam to make a  channel for the cording.


Begin with one piece of cording.  Insert the cording into the front right channel and thread it to the opposite side, being sure not to pull it all the way through.  Insert the same cording piece into the left back channel and thread through to come out the right side.  You have just made a loop with the cording.


Tie a knot at the end of the cording piece that was just threaded through the front and back channel.
Repeat the same process on the left side.  Insert the cord into the front left channel and thread through to the other side.  Insert the same cord into the right back channel and thread it through.  Make a knot with the second cord piece.


Unpick both corners at the bag bottom.  Insert the cords through the bag and push the knots out of the unpicked corners.  The bag is still turned wrong side out.


Secure the cording knots in place at both corners.  I like to stitch over it several times to be sure the seam is strong.


Turn the bag right side out and cinch the cording.  Congratulations!  You have a cute little cinch sac for your little one!


Tuesday, July 15, 2014

Wide Leg Pants Sew Along Day 3

Wide Leg Pants Sew Along Day 3


Line up the crotch pieces and sew together.  Finish seam.


Pin waistband, right sides together and attach.


Turn waistband right side out.  Fold waistband in half WST and press.


Mark waistband and shorts waist into fourths with pins.  Line up pins on waistband and shorts and pin together.


Attach waistband to shorts.  You will need to stretch the waistband between pins to attach.


Press seam.  Almost done!


Working on shorts hemline, serge raw edge.


Press hem under once.


Topstitch hemline.  I like to use a twin needle for the hemline.


Finished!  Enjoy your new shorts.


Monday, July 14, 2014

Wide Leg Pants Sew Along Day 2

Wide Leg Pants Sew Along Day 2


First decide if you want to add pockets to the shorts.  You can find tutorials for Patch Pockets and Inset Pockets on the Jocole blog.  You can also make Inseam Pockets according to the pattern directions.  I choose to make Patch Pockets.  Finish the pockets and place onto the back of the shorts.  Placement for the pockets is a personal choice but I like to place them at a slight angle and close to the center seam.


Line up the side seams of the front and back pieces.

Sew and finish seams.


Iron the side seams toward the back of the shorts.


Optional:  I like the finished look a double needle adds.  Topstitch the side seam with a double needle on the shorts back, right at the seam.

At this point the side seam of the shorts should look similar to the picture above.
http://sweeterthanitseams.blogspot.com
Line up the crotch on both the front and back pieces.  Sew together at the curved crotch and serge.  

Come back tomorrow to finish up the shorts!  :)


Sunday, July 13, 2014

Wide Leg Shorts Sew Along

Wide Leg Pants Sew Along

Shorts Edition


Materials Needed:

  • Wide Leg Pants Pattern
  • Freezer Paper (optional)
  • Main Fabric
  • Knit Waistband Fabric

Gather materials.


Trace pattern pieces onto freezer paper.
If adding pockets, mark pocket placement onto freezer paper.

Cut all pattern pieces; two front, two back and two pockets (making sure to cut the fabric with two layers, wrong sides together).  I cut the pattern at the shorts cutting line which results in fairly short shorts.  If you prefer a longer length short, extend the cut line 2-4 inches.

Tomorrow we will construct most of the shorts and then finish the shorts on Wednesday.  The Wide Leg Pants pattern is simple and fast.